Step-by-Step Guide to Make Quick Can in the Rear Roast Chicken
Hello everybody, I hope you're having an incredible day today. Today, I'm gonna show you how to make a distinctive dish, Step-by-Step Guide to Prepare Homemade Can in the Rear Roast Chicken. One of my favorites food recipes. This time, I am going to make it a little bit tasty. This is gonna smell and look delicious.
In regards to cooking, it's crucial to take into account that everyone started somewhere. I do not know of one person who came to be with a wooden cooking spoon and ready to go. There's a good deal of learning that must be done in order to be prolific cook and there is always room for improvement. Not only would you will need to begin with the basics in terms of cooking but you almost should begin again when learning to cook a new cuisine such as Chinese, Thai, or Indian food.
The same holds true for lunches when we often resort to your can of soup or even box of macaroni and cheese or some other similar product instead of putting our creative efforts into creating an instant and easy yet delicious lunch. You may see many thoughts in this guide and the hope is that these ideas will not only get you off to a great start for ending the lunch R-UT we all seem to find ourselves in at a certain time or another but also to use new things all on your very own.
Try sandwiches using different breads. Surprisingly, my children love trying new things. It's a rare trait that I am extremely grateful. Believe me I know all too well how fortunate I am. Her favourite sandwich choice is now Hawaiian candy rolls. We put the beef, cheese, mustard, and pickle in her roll as though it were a bun and she is thrilled. Additional great ideas comprise hollowing out crusty rolls and filling them with roast beef and cheddar. You can replicate this in your toaster for a few minutes for a rare sandwich cure. The cooking area is very minimal and you also usually do not have to own in depth comprehension of anything to get ready or enjoy those treats that are simple.
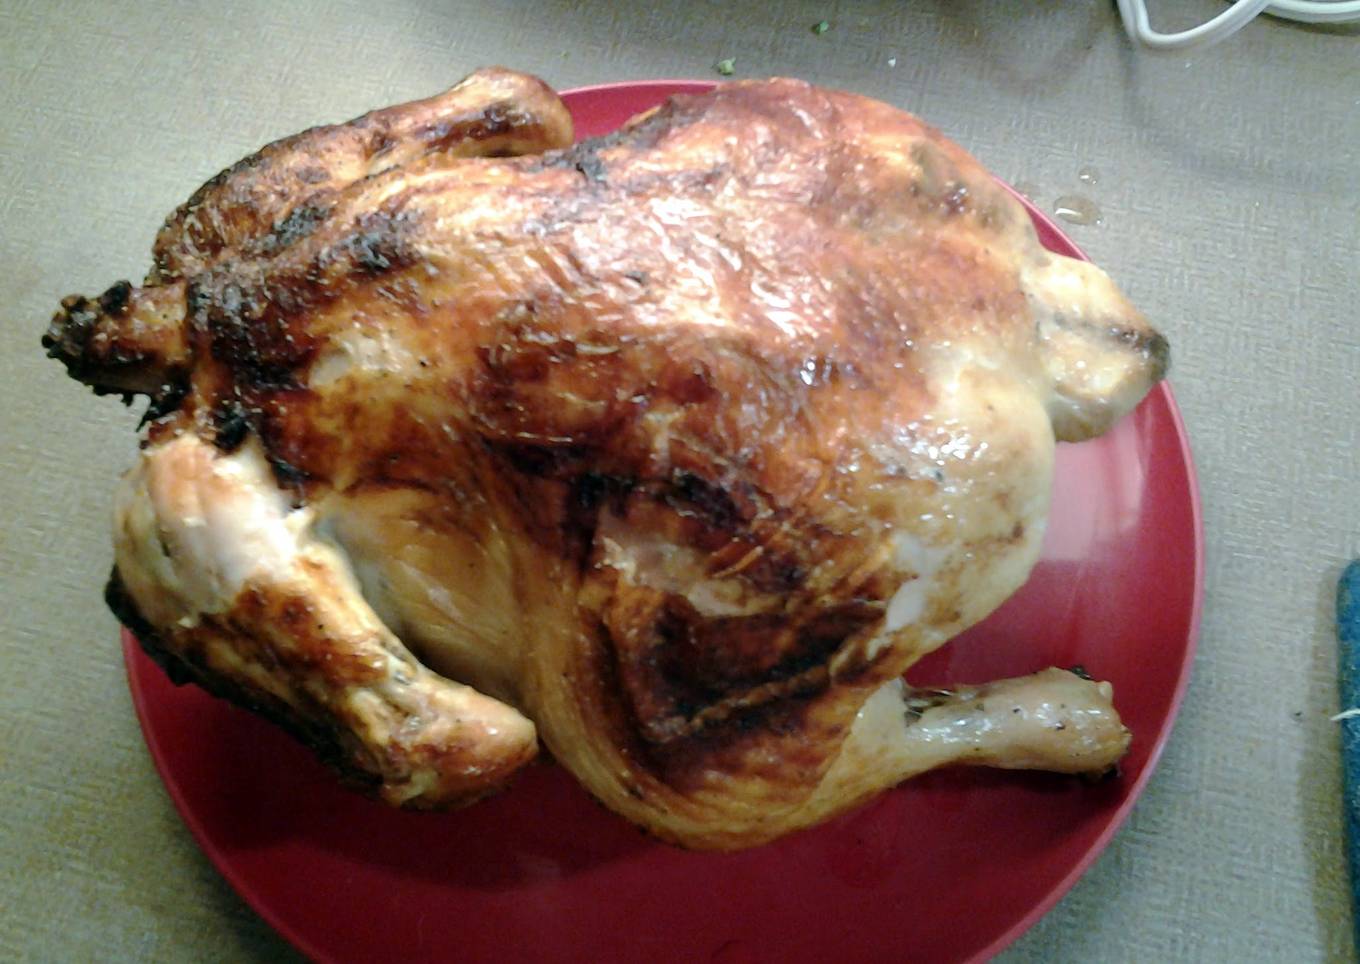
Many things affect the quality of taste from Can in the Rear Roast Chicken, starting from the type of ingredients, then the selection of fresh ingredients, the ability to cut dishes to how to make and serve them. Don't worry if you want to prepare Can in the Rear Roast Chicken delicious at home, because if you already know the trick then this dish can be used as an extraordinary special treat.
As for the number of servings that can be served to make Can in the Rear Roast Chicken is 6 servings. So make sure this portion is enough to serve for yourself and your beloved family.
Just in addition, the time it takes to cook Can in the Rear Roast Chicken estimated approx 15 mins.
To begin with this recipe, we have to first prepare a few components. You can have Can in the Rear Roast Chicken using 7 ingredients and 10 steps. Here is how you can achieve that.
Ingredients and spices that need to be Prepare to make Can in the Rear Roast Chicken:
- 1 whole chicken about 5lbs
- 1 lemon
- 1 small onion
- 2 clove garlic
- 1 empty aluminum can 12-16oz cleaned
- 4 tbsp melted butter or olive oil
- 1/2 cup water
Instructions to make to make Can in the Rear Roast Chicken
- Brine chicken (see my poultry brine recipe.) Rinse chicken and pat dry. Make sure to remove chicken insides!
- Wash and rinse your can. I find a 16oz works best and carefully enlarge the opening
- Chop lemon, onion into pieces that will fit in can.
- Crush garlic and add to can.
- Add water to fill can 3/4 full and place in baking dish
- Place chicken on top of can with legs down. This will support chicken while cooking and ingredients will infuse flavor.
- Brush bird with melted butter or olive oil. I don't add any other seasonings because if you brine first you don't need to. If you didn't brine (which I highly suggest brining) you would want to season with salt, pepper ect.
- Bake for 35-40 min; remove and baste again. Return to oven and bake another 35-40min or until meat therm reaches 165
- If roasting veggies add them before you put the bird in for the second time.
- Remove from oven and carefully remove can and place bird on serving plate. Cover loosely with foil and let rest 10-15min before carving.
It's those tiny steps that you take towards your goal of cooking healthy foods for the family which will matter a lot more than any giant leap. Before you realize it that you may discover that you have greater energy and a greater understanding of general wellbeing than you would have imagined before changing your eating habits. If this isn't sufficient to encourage you however, you can always check out the excuse to shop for new clothes when you drop a size or 2.
So that is going to wrap this up with this special food Step-by-Step Guide to Prepare Favorite Can in the Rear Roast Chicken. Thanks so much for reading. I'm confident you will make this at home. There is gonna be interesting food at home recipes coming up. Don't forget to save this page in your browser, and share it to your family, colleague and friends. Thanks again for reading. Go on get cooking!


Post a Comment for "Step-by-Step Guide to Make Quick Can in the Rear Roast Chicken"